Detailed Information
To configure WiCam correctly for different scenarios it is important to know a little bit more about the settings. This page provides a detailed look at WiCam's settings.
FTP Settings
Currently WiCam allows you to setup and store settings to connect to up to 3 FTP servers. To add an FTP server, simply select 'Edit', and the '+' from the 'FTP Settings' menu. The setup screen you will see will look something like this.
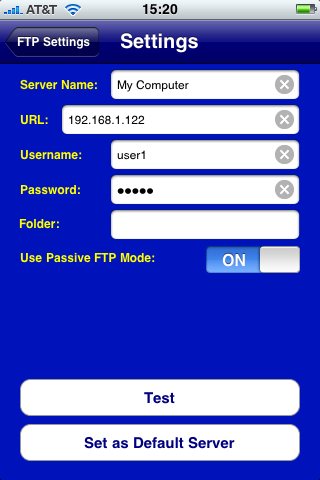
Server Name:
The first piece of information on this screen is the Server Name. What is entered in this field is not important. It is just meant as a reminder. To help you easily identify the difference between multiple servers.
URL:
Next is the URL (Uniform Resource Locator). This is used to identify the address of the server you wish to upload to. This field can either a URL or IP Address that can be used to contact your FTP Server. (i.e. www.janet-and-john.com or 192.168.1.101 etc.)
Username and Password:
In order to upload images to an FTP server, you must first log in. Most FTP servers will require a username and password, so these need to be entered here. Passwords are blanked out immediately for your security.
Folder:
The Folder option allows you to specify the exact folder path on the server. For example if I specify "web/homefolder/" and my URL is www.janet-and-john.com, then WiCam will upload files to "ftp://www.janet-and-john.com/web/homefolder/"
Use FTP Passive Mode:
This option allows you to turn of FTP Passive mode. Most ISPs will prefer you to connect using passive mode, but check with your ISP for the best settings. If Active mode is required then this can be used by setting passive mode to OFF. If in doubt leave passive mode switched ON.
Preferences
WiCam enables you to configure the following preferences for your image uploads. This screen will look something like this.
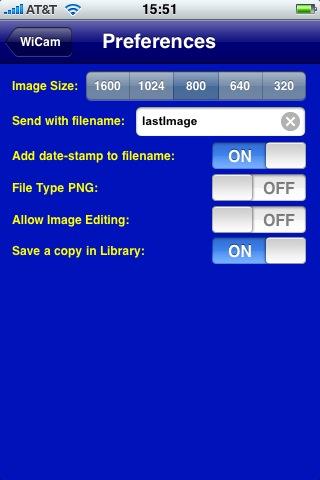
Image Size
Before an image is sent WiCam will automatically rotate and resize the image. This option allows you to select what size the image will be. The options are 1600x1200, 1024x768, 800x600, 640x480 and 320x240. The larger the number the better quality your image will be but it will be a larger file size and therefore will take longer to transmit.
Send with Filename
This option allows you to specify the filename that the image will be when it is uploaded to the server. E.g. In the example above the filename will be 'lastImage.jpg'. If a file already exists on the server with the same name then this will have the affect of replacing the file with your latest image.
Add Date-stamp to filename
This option
allows you to configure WiCam so that it will never overwrite an existing file on the server. WiCam simply adds a datestamp to the filename, for example "lastImage20100223-192656.jpg", which contains the year, month, date, hours minutes and seconds at the time WiCam begins its tranmission.
File Type PNG
This option simply converts the picture to a PNG format before sending. With this option enabled you filename will be
'lastImage.png'. With this option switched off WiCam will send images in the most common JPEG format. If in doubt leave this option switched off as most computer applications will prefer this format.
Allow Image Editing
With this option enabled, WiCam will allow you to move, zoom and crop the image before sending.
Please note that with this option enabled the dimensions of the edited image will be different to the that specified in the Image Size option.
Save a copy in Library
This option allows you to save a copy of each image transmitted. The image will be saved to the Camera Roll folder in your photos application on the iPhone. Set this option if you want to ensure you have a copy of the image that you can resend if the transmission fails or is interupted.